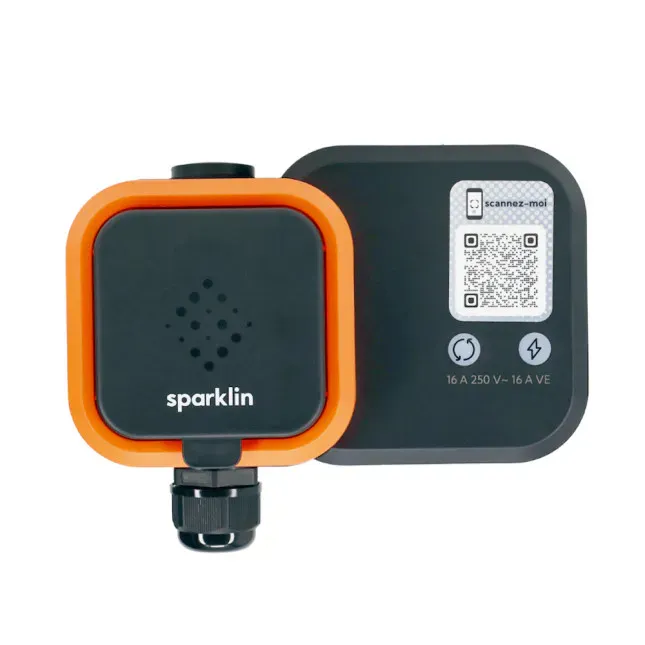
Sparklin Spark 1 Connected Enhanced Plug: the ideal charging solution for cottages, hotels, campsites, and Airbnb?
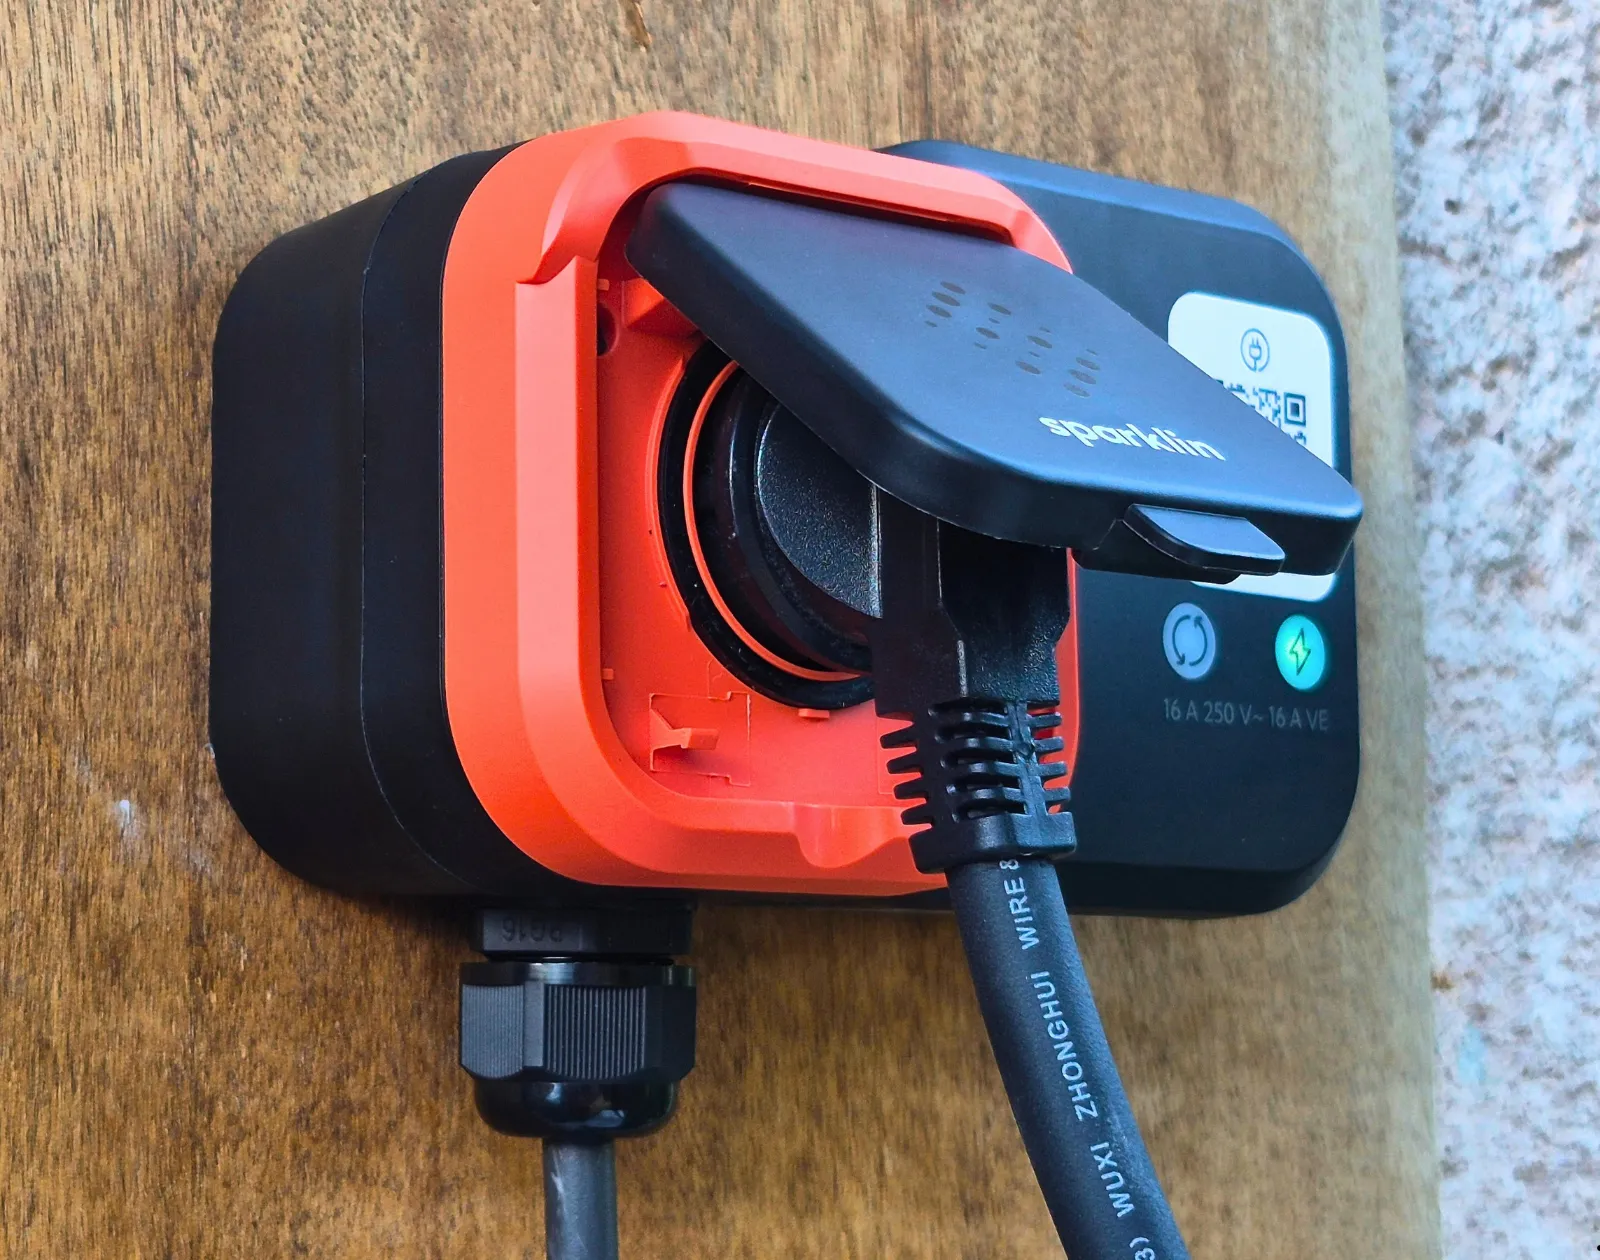
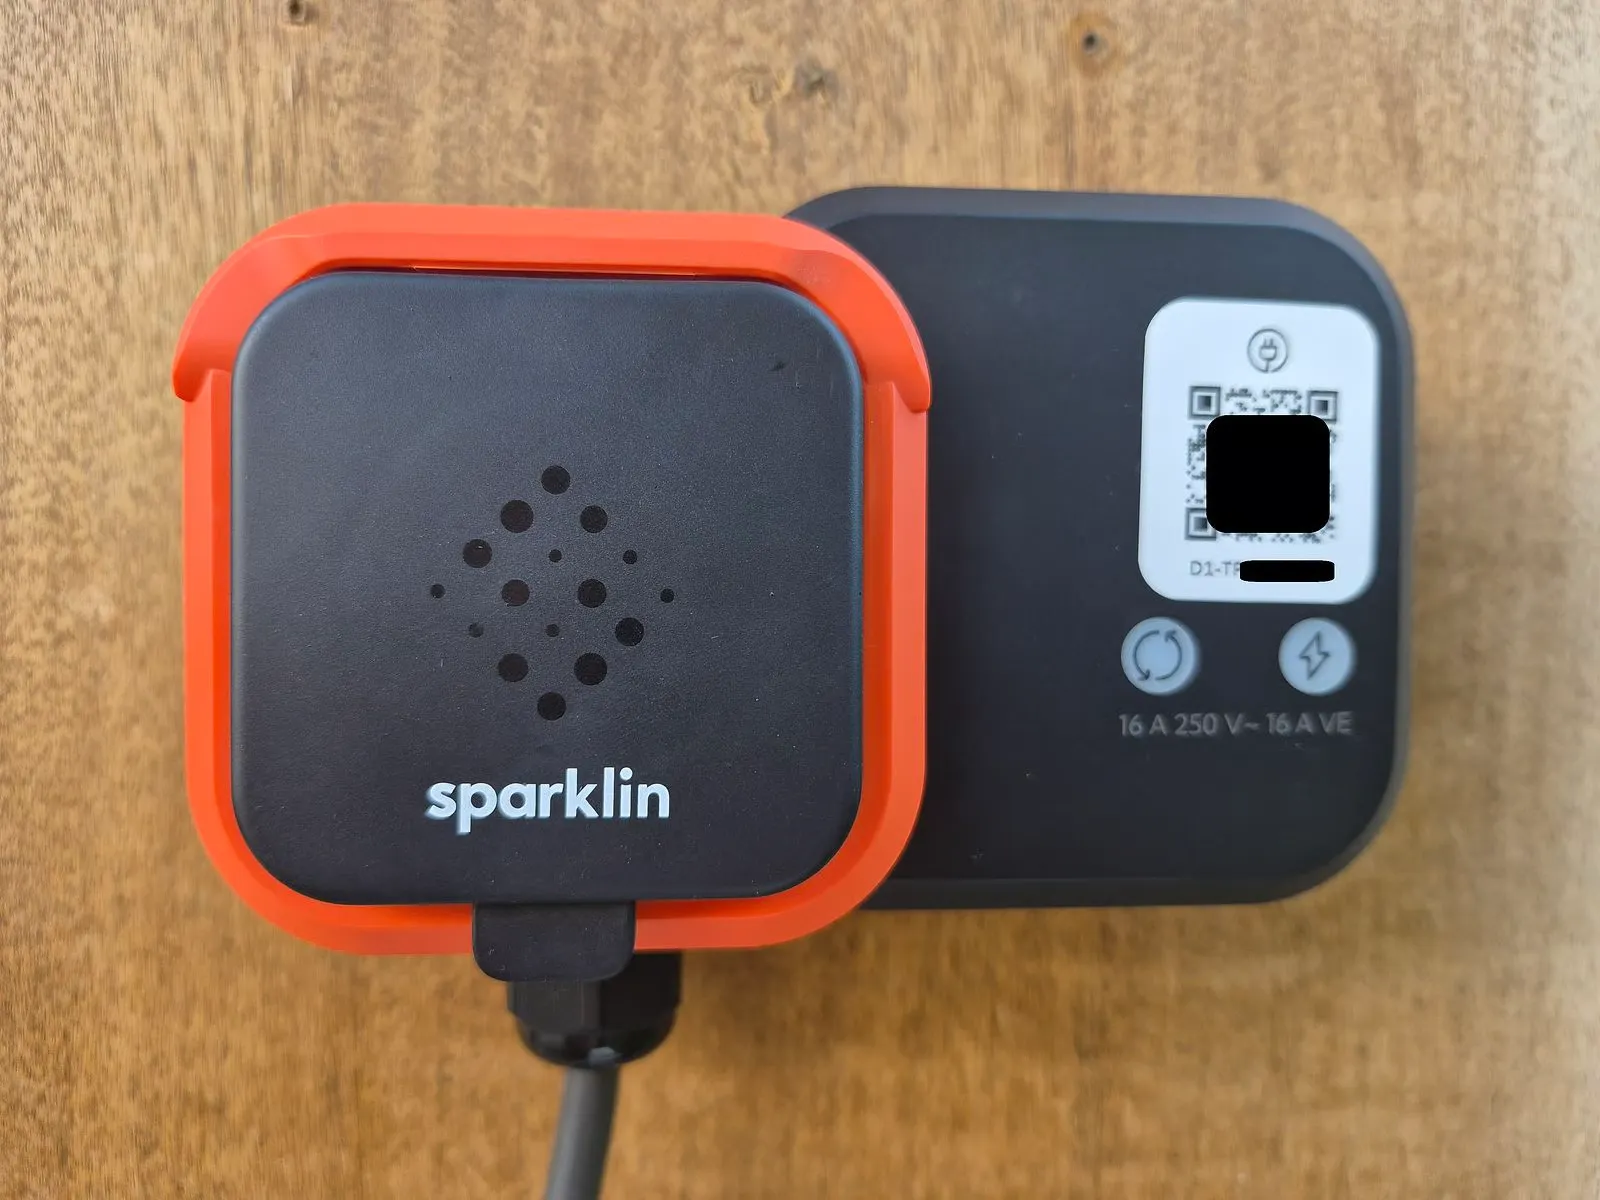
Providing charging access to electric vehicle owners is a significant advantage for property owners of vacation rentals, inns, guesthouses, hotels, campsites, and others. While installing charging stations can be costly and their management complex, a French startup offers an innovative and much cheaper alternative. With its connected enhanced charger Spark 1, Sparklin aims to make charging solutions more accessible and simpler for professionals. We tested it from installation to monetization.
If you frequent campsites, you’ve likely seen these signs that explicitly prohibit charging an electric vehicle in the parking spaces. Owners of seasonal accommodations may have denied you access to a charger even though one is available in their parking lot. On the other hand, more generous hosts might have offered you charging facilities without fully understanding the cost or whether they have the appropriate electrical setup.
Despite the growth of electric vehicles, access to charging “at destination” remains chaotic today. This is a real obstacle to their widespread adoption: without the ability to charge upon arriving at one’s vacation spot, the only option is to use public charging stations. These stations are sometimes occupied, malfunctioning, located far from the accommodation, and often very expensive.
Providing charging for customers can be very expensive
Vacation rental owners might hesitate at the idea of allowing their guests to charge free of charge. They first need to invest in an expensive charging station. The simplest configuration can cost between 1000 and 1500 euros, with much higher costs if a station with advanced features (access control, monetization, etc.) is chosen or if the installation is complex (remote location, insufficient power supply, etc.).
Once the charging station is installed, what about billing for recharges? It’s entirely possible to offer this service to customers, but it can result in significant costs depending on the facility’s usage level and the electricity supply contract chosen. A year of recharges at a full charge per day (50 kWh) amounts to 3,620 euros at EDF’s “base” blue tariff. This is a trivial cost for a luxury hotel, but a heavy burden for a small guesthouse.
Also read
We tested a 7 kW charging station for less than 100 euros—the cheapest in the world!
A very cost-effective power outlet in terms of purchase and installation
Most importantly, the Spark 1 is significantly cheaper than a wallbox, both in purchase price and installation costs. Selling for around 300 € including tax, it costs two to three times less than a premium charger. Its connection requires a cable with a smaller cross-section (2.5 to 4 mm²) and less sophisticated protective devices, thus resulting in much lower costs. With a maximum power output of 3.7 kW, it does not necessarily need to be installed by an electrician with IRVE qualifications, allowing more installers to compete for the job. Therefore, the total installation cost for a Spark 1, including equipment, supplies, and labor, can be estimated at around 800 € including tax.
Installing the Connected Spark 1 Reinforced Plug
It’s obviously cheaper to install the plug without hiring a professional. We did it ourselves with no difficulty. First, you need to install the power supply line for the plug. In the main panel, a 20 A circuit breaker should be placed downstream of a 25 A Type A or F differential switch. We then run a 10-meter long cable with a 3 x 2.5 mm² core and ICTA insulation. The entire setup costs around 80 euros if you choose equipment from well-known French brands.
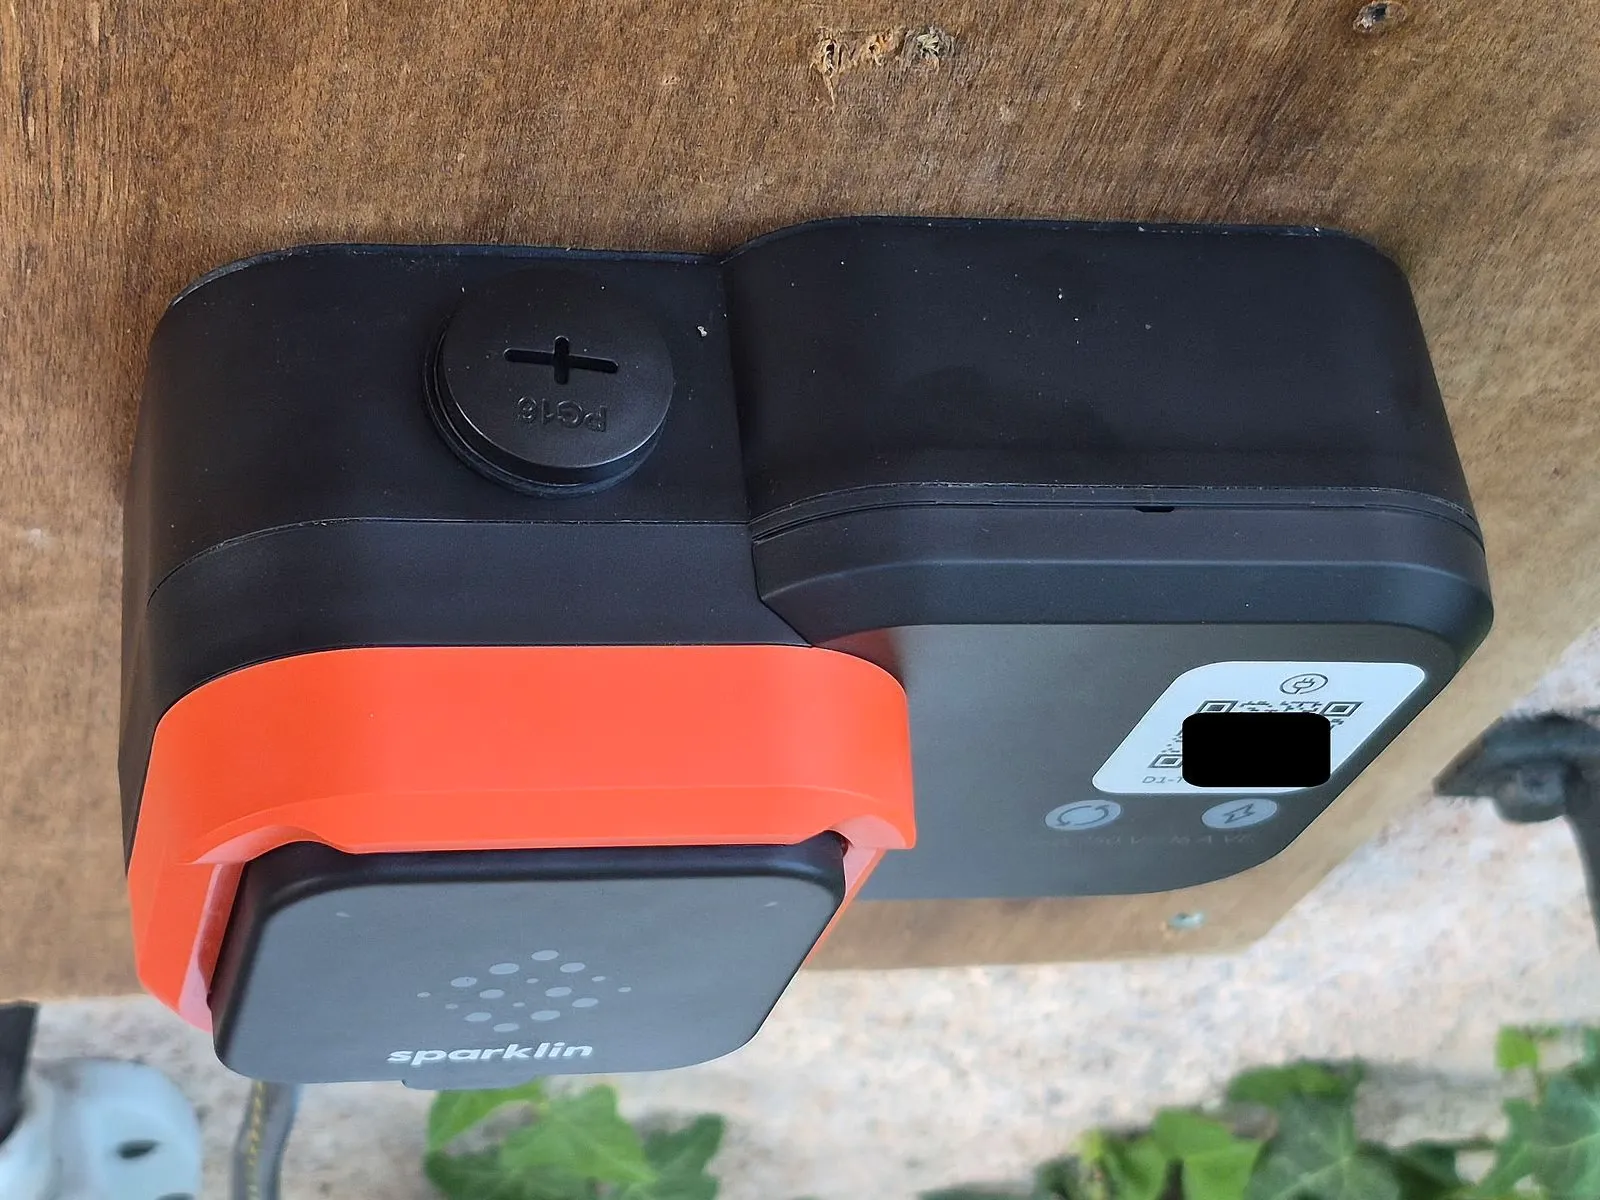
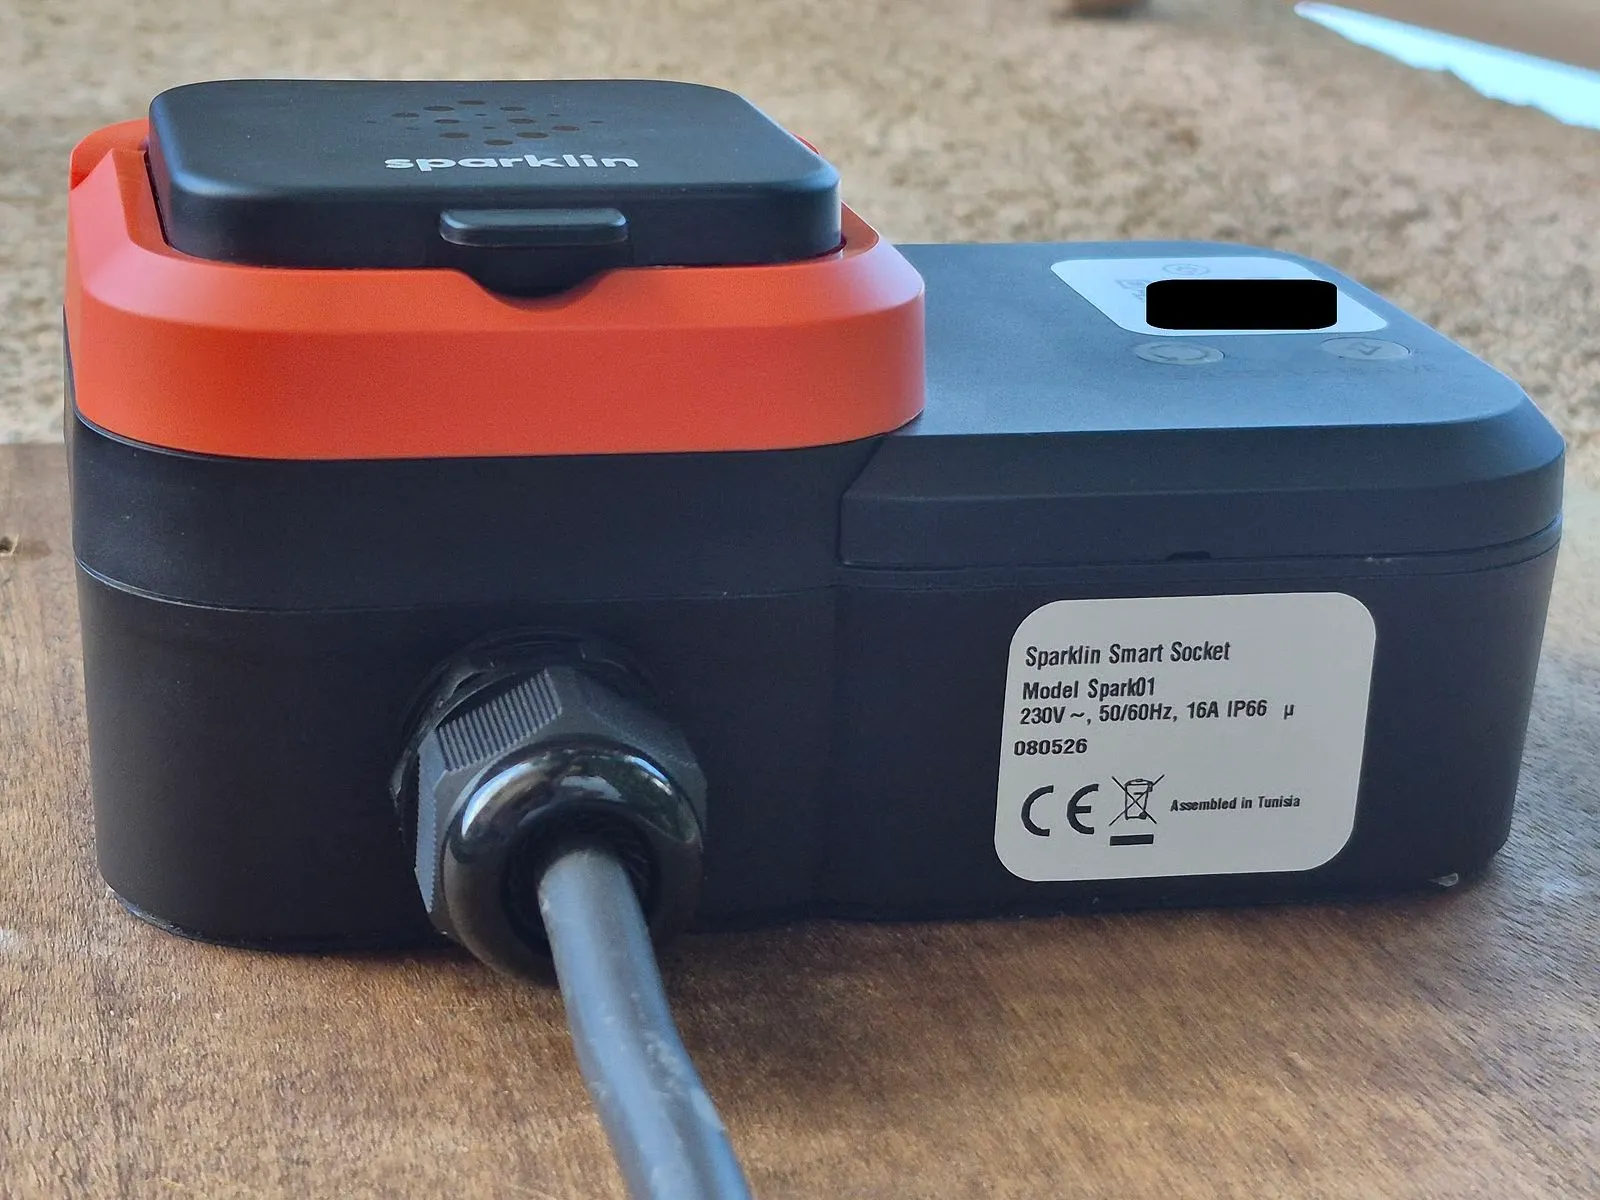
Installing the reinforced outlet is certainly the simplest part. The Spark 1 comes ready to be mounted, complete with its wire gland, plug seal, stainless steel screws, and two sealing caps. However, the fasteners needed to secure the outlet to the wall are not included. The package also includes a very comprehensive user manual that details the tightening torque, wire exposure length, and recommended cable types.
Technical specifications of the connected reinforced outlet
Sparklin Spark 1
Maximum load capacity
3.7 kW
Current
16 A
(non adjustable)
Voltage
220-250 V, single-phase
Connectors
- E/F type outlet 2P+T
- Power connection via Wago connector up to 4 mm²
Recommended power cable types
U-1000 R2V, H07 RN-F (with connectors), FR-N1X1G1
Cable pass-through
Top, bottom, or back of the socket. Plug stopper and sealing cap included.
Interface
- Smartphone app (for users)
- Management website (for owners)
- 2 LEDs on the front
Features
- Access control via smartphone app (via QR code scanning or geolocation)
- Monetization of top-ups (payment via credit card on the smartphone app, through Stripe)
- Differentiated top-up prices based on user (ability to create user communities)
- Distinguishing between personal and business top-ups.
- Management of billing, expense notes, and top-up sessions (exports available)
Connectivity
- 4G(LTME), 5G Ready (monthly subscription required)
- Wifi, Bluetooth (depending on version)
Plug material
Polypropylene, stainless steel screws, rubber seals
Dimensions (L x H x D) and weight of the plug
16.4 x 10.1 x 7.8 cm
0.5 kg
Operating temperature
-20 to +45 °C
Durability
- Water resistance: IP66 (IP55 if cable passes through the back of the plug)
- Shock resistance: IK08
- Resistance to chlorinated products at pH 10-11, alkaline substances at pH 9-10, acids at pH 3; resistance to salt mist for 168 hours; self-extinguishing at 850°C/30 seconds for insulating parts that hold live components in place, 650°C for other insulating parts.
Safety Features
No built-in protection in the plug (they must be installed upstream on the power distribution board)
Compatible with Green’up
No
Standards and Certifications
CE, TÜV Sud, IEC 60884-1, NF EN 60669-2-1, 2014/53/EU (RED), NF C 61-314, NF C 14-100, NF C 15-100, NF C 17-200
Warranty
2 years
Origin
Design: France
Materials: China
Assembly: Tunisia
Mount the enclosure to the wall
The first step is to screw the enclosure against the wall. It’s not very complicated: there are four easily accessible holes. The two holes located in the left compartment, where the plug is situated, must be fitted with screws covered by the two sealing caps provided. Note that the right compartment is sealed and therefore inaccessible. Only a cover allows access to the other two wall mounting holes.
The sealing gasket surrounding the back of the plug appears to be of very high quality. It perfectly fills the gap between the wall and the plug, so when the plug is unscrewed, its imprint remains on the wall. A second gasket, placed between the plug cover and the compartment, is removable: be careful not to over-tighten it or damage it.
Connecting the power supply
Once the enclosure is secured, the next step is to complete the electrical wiring. This process is particularly convenient since the holes have already been drilled. All that’s needed is to screw the cable gland provided in the desired position—either at the top or bottom connection point. For a connection where no cable is visible, directly at the back of the socket, the manual recommends using an sealing gasket.
We thread the previously stripped power cable into the cable gland. A Wago-type automatic connection terminal then makes wiring easier. It accepts wires with a cross-sectional area of 2.5 to 4 mm². An adhesive label indicates the position of each wire. Three terminals are designated for the input, and the other three for the output, leading to the socket.
This one is also detachable, which is very helpful for installation. The three wires of the plug are already screwed in at the factory (we still checked the tightness, which seemed a bit loose to us since we were able to turn the screw another good quarter turn without much effort). Their ends then need to be inserted into the Wago connector.
A plug that appears robust
After a final check of the connections, all that remains is to close the plug. We first place the right-side cover, which is simply clipped in, then the left-side cover, which is secured with two tiny stainless steel screws equipped with a small gasket (provided).
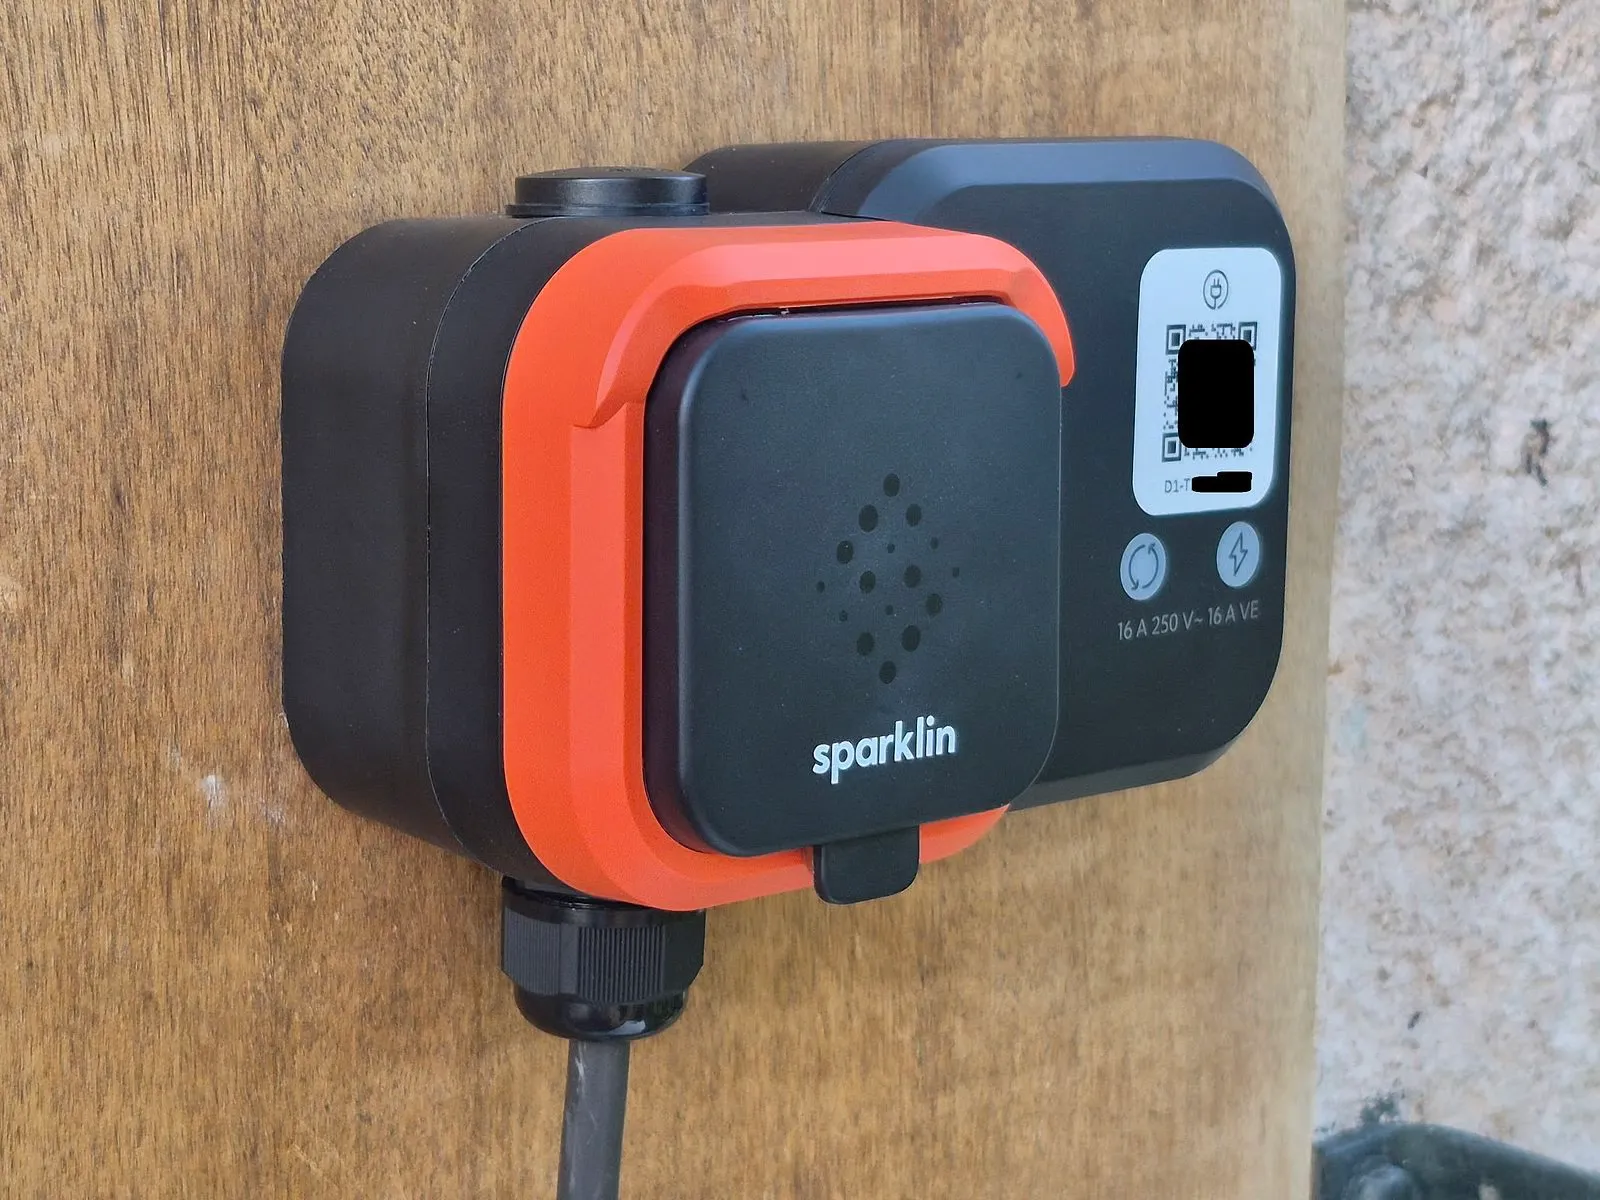
It’s ready—the plug is prepared. It appears sturdy, though it’s made of polypropylene, whereas most plugs on the market use polycarbonate or polyethylene. Each plastic has its advantages and disadvantages: while polypropylene is usually sensitive to extreme cold (it resists less impact at negative temperatures), it offers excellent resistance to chemical agents and can withstand high temperatures up to 100 °C.
Powering on and configuration
We turn on the circuit breakers to activate the Spark 1. One of the two LEDs on the front lights up orange as it establishes a connection to the 4G network. It turns green a few minutes later. These LEDs also change color and blink slowly depending on the charging status (vehicle connected, charging, plug available, or out of service).
It’s time to configure it on the “Spark Pilot” platform provided by Sparklin for owners. Unlike the interface designed for plug users, Spark Pilot does not use a smartphone app but rather a website. More convenient to use on a computer, it can also be accessed from a mobile device though with less user-friendly design.
Get paid for top-ups in just a few minutes
There are numerous configuration options. The plug can be set to public or controlled access, with top-ups either paid or free. It’s even possible to create user communities and assign each one a specific top-up price or make it free. The owner can freely set the cost per kilowatt-hour (kWh) for top-ups and the amount of any access fees.
Setting up payment by credit card is very simple: we completed it in just a few minutes. All that’s needed is to provide the company’s details, its bank account information, and answer a few questions from Stripe, the intermediary chosen by Sparklin for transactions. We charged our own account for the test and encountered no issues at all.
The only disappointment is the fairly high fees charged by Stripe for each top-up (0.39 €). Although these fees are passed on to the customer and thus have no impact on the owner, they are fixed amounts. They don’t adjust based on the amount topped up, which can be frustrating for users. The total amount of top-ups is transferred directly to the provided bank account on the 1st of each month.
Can it become profitable within six months?
By setting the price to achieve a margin of 0.10 € per kWh (which is approximately 0.30 €/kWh for the customer based on EDF’s “base” blue tariff), it is possible to generate a monthly revenue of 150 € with daily usage of 50 kWh. This allows for a very rapid return on investment for the purchase and installation of the charger, as well as the mandatory monthly subscription of 4.99 €/month charged by Sparklin (offered in the first year).
A business frequented by customers with electric cars can therefore expect a return on investment in just six months, assuming intensive use of the charger.
Also read
How this hotelier-restaurateur promotes electric cars
A useful charger for service vehicles charged at home
Among the other features offered by Spark 1 is the ability to distinguish between personal and business charging. This is useful for employees who have an electric company vehicle charged at home: charges made for work are automatically deducted to be covered by their employer. A tab is dedicated to the billing section, allowing for the export of expense reports, invoices, and summaries of charging sessions.
An OCPP connection is also available to enable use across various public charging platforms. It’s also possible to configure the outlet so that it isn’t accessible to the public and thus doesn’t appear on the map of public outlets in the Sparklin app. In all cases, Sparklin’s customer service, contacted by phone, was very responsive in answering our questions about outlet configuration. Additionally, Sparklin promises that the servers used to run connected services are located in France.
Also read
Reinforced outlet for electric cars: here are the best alternatives to Legrand’s Green’up
Charging without a certified meter? Possible but risky
The Spark 1 is equipped with an electricity consumption meter that is not certified MID. This means a user can dispute the amount charged, without the outlet owner being able to legally object. For “legally enforceable” billing, Sparklin offers a significantly more expensive version, the Spark Plus, which includes a MID-certified meter and an e-Ink display.
However, when testing the user-side interface (the client that plugs into the outlet), we found that the Spark 1’s meter is quite accurate. After charging our Renault Zoé, it showed a total of 24.77 kWh compared to 24.3 kWh recorded by our Shelly Pro 3EM meter. We have never observed such a small discrepancy in our tests of charging stations, cables, and outlets for electric vehicles.
In standby mode, the Sparklin charger consumes very little power despite its 4G connection. We recorded an average daily consumption of 33 Wh (equivalent to 1.4 W on average), which is comparable to any other charging station.
A smartphone app for users
To charge using a Spark 1 charger, the user must download the Spark 1 smartphone app (another one!) and create an account. This step seems unnecessary for customers who want to charge quickly without having to provide their personal information (email and phone number).
Next, simply scan the QR code on the outlet to view its access terms (whether it’s paid or free). Those more cautious will notice that there is a risk of fraud involving fake QR codes. This is a type of scam that has already been observed on several charging networks, where the original QR code is replaced with one that leads to a fake payment page mimicking the real one.
If charging is paid, the customer must enter their credit card details, and an authorization hold is placed. They then have 1 minute and 30 seconds to connect their vehicle. Charging begins, and the app instantly displays real-time data: charging duration, total consumption, power level, estimated range added, and for some vehicles, the battery percentage. A summary is provided at the end of each session. We have not encountered any bugs or delays during testing our charging service.